Window Vent Construction
by
John de Jong
This article describes what I did to add a sliding window to my HP14. This was done when I replaced my canopy (after hail damage), but is applicable to any canopy that is already mounted to the canopy frame. I apologise for the lack of construction photos, but I have included photos of the completed assembly.
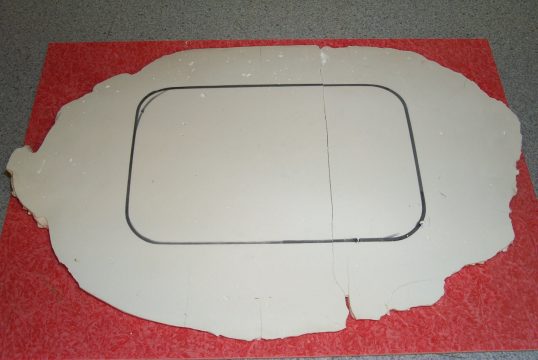
What I did first was decide where on the canopy I wanted the sliding window, and I marked that area out with a non-permenant marker. I then laid the canopy on its side (window area down, and placed ~ 1/2" of plaster over the area previously marked out. This will make the plaster form of the canopy curvature of the required area.
 After the plaster has hardened
I removed it from the canopy and proceeded to cut the opening in the canopy,
using a drill for the corners, a die grinder for the straight sides, and lots
of elbow grease using a variety of files and then sand paper to finish the opening
to final size. NOTE: all tool marks MUST be removed from the edges of the opening
(literally polished) or you risk cracks propagating away from the window hole.
With the opening now complete, I placed the plaster mould inside the canopy
again, and marked the opening onto the mould so that I would know where to put
the plexiglass blanks during the forming process.
After the plaster has hardened
I removed it from the canopy and proceeded to cut the opening in the canopy,
using a drill for the corners, a die grinder for the straight sides, and lots
of elbow grease using a variety of files and then sand paper to finish the opening
to final size. NOTE: all tool marks MUST be removed from the edges of the opening
(literally polished) or you risk cracks propagating away from the window hole.
With the opening now complete, I placed the plaster mould inside the canopy
again, and marked the opening onto the mould so that I would know where to put
the plexiglass blanks during the forming process.
I then laid a 1/4" piece of plexi on top, and heated it in an oven until the plexi softened and matched the plaster form. Be careful that the oven temperature is kept as low as possible, or the pieces formed will bubble. For the plexiglass I used ~ 300-350F was about right. It took ~5 to 10 minutes for each blank to form, but that is highly dependant on the oven temperature and the material used.
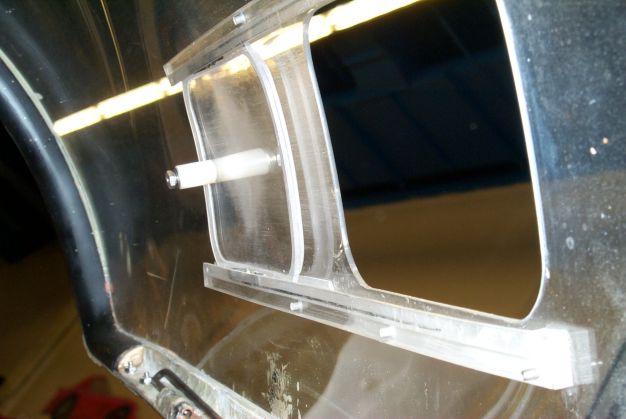
The piece just formed can now be placed inside the canopy to match the curvature as closely as possible. Using a marker I traced the opening onto the slider blank. Add 1/4" on all sides to the traced portion, and trim to this size. Route a 1/8 deep by 1/4" wide groove around the edges and you will have a very nice sliding window. After routing, make sure that all scratches/tool marks are sanded and then polished out, or the window will begin cracking around the edges like you can see mine doing (I made up 4 blanks at the same time so I would have spares). To finish the slider, all that needs to be added now is a handle, and springs (to hold the window tight to the canopy. The handle I made out of a piece of nylon rod, which was drilled through and screwed to the slider. The springs were made of very light (~.020") stainless steel spring stock ~.1"X3" long, and also screwed to the slider using #2-56 screws.
 The rails can be made by routing up some 1/2" X 1/2" plexi into the shape required
using a router table. By using a router table you can jig up the required cuts
for the rails can be made straight consistantly. In addition, you can make up
a number of sets of spares very quickly and be real popular with everyone at
the field who has broken rails. A good look at a set of Mecaplex(r?) rails will
give you an idea of what the dimensions should be, but make sure that the rails
hold the slider completely off the inside of the canopy when opening. If this
is not done, you will get scratches on you canopy behind the opening (as I did).
The brackets should be tapered at the front to match the caopy taper (see top
view), this can be done with jigs on the router, or they can be sanded to shape.
Drill mointing holes (to be tapped to #4-40) in the brackets when done, but
do not tap them for a screw thread yet.
The rails can be made by routing up some 1/2" X 1/2" plexi into the shape required
using a router table. By using a router table you can jig up the required cuts
for the rails can be made straight consistantly. In addition, you can make up
a number of sets of spares very quickly and be real popular with everyone at
the field who has broken rails. A good look at a set of Mecaplex(r?) rails will
give you an idea of what the dimensions should be, but make sure that the rails
hold the slider completely off the inside of the canopy when opening. If this
is not done, you will get scratches on you canopy behind the opening (as I did).
The brackets should be tapered at the front to match the caopy taper (see top
view), this can be done with jigs on the router, or they can be sanded to shape.
Drill mointing holes (to be tapped to #4-40) in the brackets when done, but
do not tap them for a screw thread yet.
Now all that is left to do is attach the rails to the canopy. I did this by first taping the slider into place from the outside. Now the lower rail can be positioned below the slider. Drill the forward most hole using the same drill bit that was used to drill the rails and use a #2-56 pan head screw temporarily attach the rail to the canopy. Repeat for the aft most hole. Now the remaining lower rail mounting holes can be drilled in the same way and temporarily fastened using 2-56 screws.
Now the upper rail can be placed in position on top of the slider. Drill the front most hole and temporarily use a 2-56 screw to hold the rail in place. Now remove the tape, open the slider fully, and tape it into position. Now drill the rear hole, and screw into place. Drill the remaining holes in the upper rail.
Now that all the holes are drilled, remove both of the rails. The rails can now be tapped to a 4-40 thread, and the holes in the canopy can be opened up to the proper diameter for a 4-40 screw, and the canopy countersunk for a flat head screw.
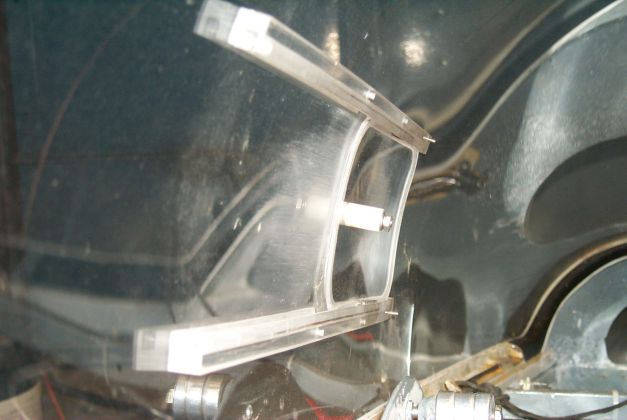
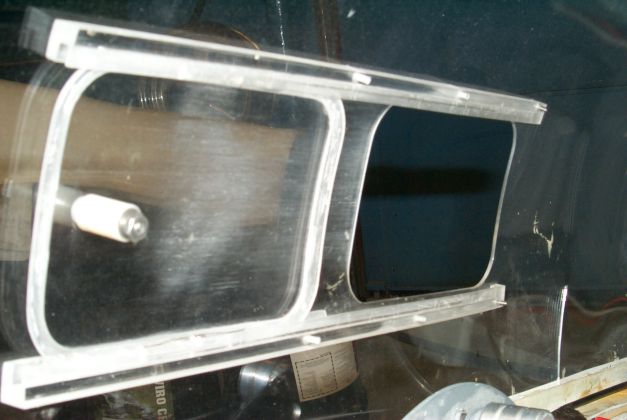
As can be seen in the top view the finished product is fairly true to the canopy contour. A closer countour can be achieved by making sure that you mark the plexi with some registration marks after moulding (before removing from the form). I forgot to, so the section I used was slightly offset.
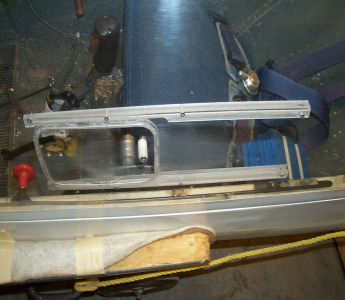
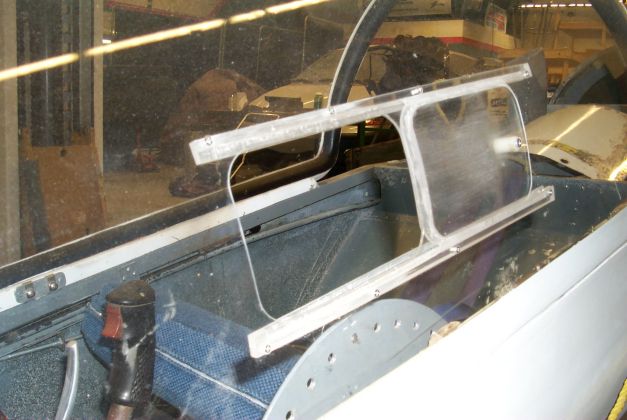
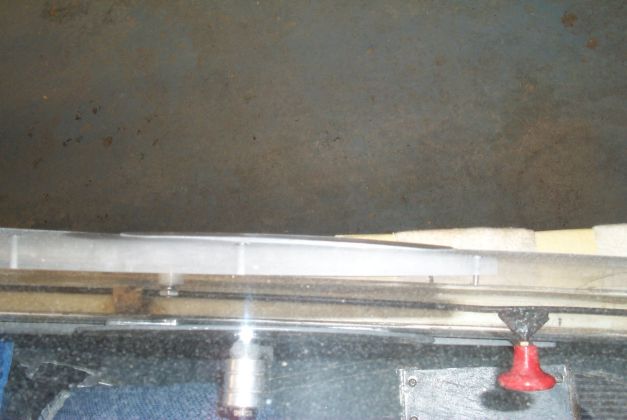
The rest of the photos are to give an idea on how it all went tegether, and give an idea of what the rails look like.
Notes: - Make sure that all drill bits and countersink tools used are very sharp. Not doing so makes it much likelier that you will push hard and risk cracking the plexi. Also let the cutting tools do so at their own rate! Do not force or the results can be very painful and expensive.
- Do not over tighten the hardware, as stress WILL cause cracks eventially
- Polish all edges, as any tool mark/scratch left will eventually start cracking or crazing.
Good Luck!
Inside Front and Top Views
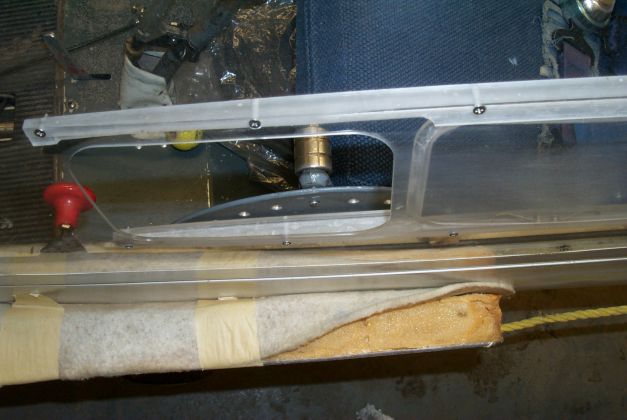
Inside Rear Views